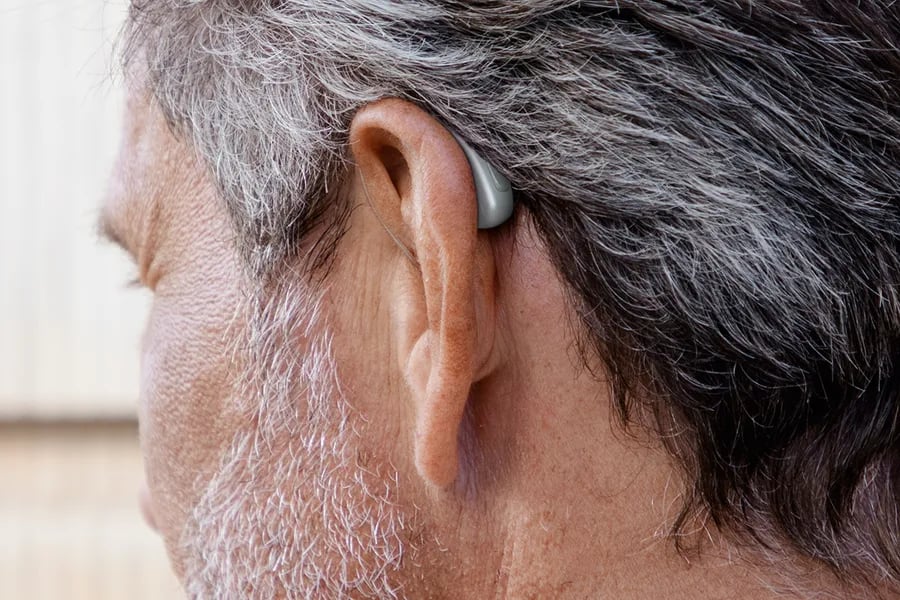
Hearing aids are sophisticated medical devices that work hard every day in one of the body’s most challenging environments—your ear canal. Between earwax, moisture, skin oils, and everyday dust, these tiny computers are constantly exposed to elements that can compromise their performance. The good news? A consistent cleaning and maintenance routine can extend your hearing aid’s lifespan, preserve sound quality, and prevent many common faults before they start.
Whether you’re a new hearing aid wearer or have been using devices for years, establishing proper maintenance habits is just as important as the initial fitting itself. At The Audiology Place, we’ve seen firsthand how regular care routines separate hearing aids that perform reliably for 5-7 years from those that require frequent repairs. This guide will walk you through the essential daily and weekly tasks, explain when critical components need replacing, and help you recognise when professional attention is needed.
Why Hearing Aid Maintenance Matters
Your hearing aids contain delicate electronic components, microphones, speakers, and processing chips—all housed in a casing smaller than your thumb. These devices sit in or behind your ear for 12-16 hours daily, constantly exposed to cerumen (earwax), perspiration, humidity, and environmental debris. Without regular cleaning, several problems commonly arise:
Wax and debris can block sound ports, reducing volume and clarity. Moisture accumulation can damage internal electronics, leading to intermittent operation or complete failure. Dirty microphone ports result in unclear or distorted sound. Compromised wax guards allow debris to penetrate more deeply into the device, potentially causing costly damage that extends beyond simple repairs.
According to research published in hearing care journals, the majority of hearing aid repairs stem from preventable causes—primarily wax blockage and moisture damage. A study examining hearing aid returns found that proper daily maintenance reduced repair frequency by approximately 60% compared to devices that received inconsistent care. This isn’t just about cost savings; it’s about ensuring you have reliable access to sound when you need it most.
Your Daily Hearing Aid Cleaning Routine
Daily care doesn’t need to be time-consuming—just consistent. Each evening when you remove your hearing aids, dedicate two to three minutes to this routine:
Visual inspection: Examine each hearing aid under good lighting. Look for visible wax accumulation, debris in the microphone ports, or any cracks in the casing. Check that the battery door (if applicable) opens and closes smoothly.
Wipe down the exterior: Using a soft, dry cloth or the cleaning cloth provided by your audiologist, gently wipe the entire surface of each hearing aid. Never use water, cleaning solvents, alcohol, or household cleaners, as these can damage the protective coating and seals. The goal is to remove skin oils, moisture, and surface debris.
Clean the wax guard and sound port: For receiver-in-canal (RIC) and in-the-ear (ITE) devices, inspect the wax guard at the end of the receiver or sound bore. Use the cleaning tool provided with your hearing aids—typically a small brush or pick—to gently remove any visible wax. Brush away from the opening, never pushing debris further into the device.
Microphone port care: The microphone openings are tiny and easily blocked. Use the brush end of your cleaning tool to gently sweep across the microphone ports (do not insert it into them). These openings are often located on the top or face of the hearing aid and may appear as small holes or grilles.
Open the battery door or place it in a charger: For battery-powered devices, open the battery compartment to allow moisture to evaporate overnight. This simple step significantly reduces moisture-related damage. For rechargeable hearing aids, place them in their charging case. Many modern chargers also function as dehumidifiers.
Weekly Deep Cleaning Tasks
Once a week, expand your routine to include these additional maintenance steps:
Replace or clean your domes (the soft silicone tips that sit in your ear canal) by wiping them with a dry cloth or tissue. Remove the dome from the receiver and inspect for tears, discolouration, or hardening. Even if they appear intact, domes should typically be replaced monthly, as the material degrades and accumulates bacteria over time.
If you use a separate dehumidifier jar or an electric drying system, ensure you use it correctly. Place your hearing aids inside the dehumidifier overnight at least twice weekly, or nightly if you live in a humid climate or perspire heavily. Replace desiccant crystals when they change colour (usually from blue or orange to clear or pink), which indicates moisture saturation.
Check all tubing (for behind-the-ear models with earmolds) for discolouration, cracking, or moisture droplets inside. Tubing should be clear and flexible. If you notice yellowing, stiffening, or condensation that won’t dry, schedule an appointment with your audiologist to replace the tubing.
Inspect your carrying case and storage container, cleaning them with a dry cloth to prevent dust buildup. These cases protect your investment when travelling, but can accumulate debris if neglected.
When to Change Wax Guards: The Critical Timeline
Wax guards (also called cerumen filters or wax traps) are your hearing aid’s first line of defence against earwax. These small filters sit at the sound outlet and prevent wax from entering the receiver, which houses the speaker mechanism. A blocked wax guard is one of the most common causes of reduced volume or “dead” hearing aids—and it’s easily remedied.
How often to change wax guards: Most audiologists recommend changing them monthly as a preventive measure. However, the actual timeline varies based on individual factors. If you produce more earwax, you may need to change the guards every 2 to 3 weeks. Conversely, if your ears produce little wax, guards might last 6 to 8 weeks.
Signs your wax guard needs immediate changing: Your hearing aid sounds quieter than usual or has no sound at all. You see visible wax or debris covering the guard. Sound seems muffled or unclear even after cleaning other components. One hearing aid sounds noticeably different from the other.
Changing a wax guard takes less than 30 seconds once you’re familiar with the process. Most systems use either a stick tool with guards on both ends (one end removes the old guard while the other inserts a new one) or small individual filters that you insert with a special tool. Your audiologist will demonstrate the specific method for your hearing aid model during your fitting appointment.
If you’re uncertain whether a sound issue is caused by a blocked wax guard or something more serious, change the guard first. This simple step resolves the problem in approximately 70% of cases where patients report sudden volume reduction. If changing the guard doesn’t restore sound quality, contact your audiologist for troubleshooting.
Dome Selection and Replacement
Domes are the soft, mushroom-shaped silicone tips that sit in your ear canal on RIC and some BTE hearing aids. While they may seem simple, dome selection significantly affects both comfort and hearing-aid performance. Domes come in various sizes and styles, each suited to different ear canal shapes and hearing loss configurations.
Your audiologist selected your initial dome style based on several factors: your ear canal size and shape, your degree of hearing loss, and your need for venting (small holes that allow sound and air to pass through). The three main dome types are open domes (with large vents, allowing more natural sound), closed or power domes (with minimal venting, providing more amplification), and double or tulip domes (offering a middle ground with moderate occlusion).
When to replace domes: Replace domes monthly as a standard practice. The silicone material harbours bacteria and degrades when exposed to earwax and body oils, even if it appears intact. Replace immediately if you notice tears, holes, or if the dome has become stiff or discoloured. After ear infections or significant earwax buildup, replace domes to prevent reintroduction of bacteria.
If your domes are frequently falling off the receiver in your ear canal—a common concern we address at The Audiology Place—contact your audiologist. This usually indicates you need a different size or style, not a product defect. A dome that’s too small won’t seal properly and may detach; one that’s too considerable causes discomfort and may be pushed out by your ear canal’s natural motion.
Never attempt to use domes intended for a different hearing aid brand or model, even if they appear similar. Receivers are precisely calibrated, and using incorrect domes can affect sound delivery and alter the verification measurements (Real Ear Measurement or REM) your audiologist performed during fitting.
Dehumidifiers: Your Moisture Management System
Moisture is the second-leading cause of hearing-aid malfunctions, after wax blockage. The human ear canal is naturally moist and warm—an ideal environment for your hearing health, but challenging for electronic devices. Additionally, perspiration during exercise, high-humidity environments, and even steam from showers (if hearing aids aren’t removed) can introduce moisture that corrodes contacts, rusts components, and damages speakers.
Types of dehumidifying systems: Electronic drying kits use gentle heat and sometimes UV light to remove moisture and sanitise hearing aids. These typically run on timers (3-8 hours) and are especially valuable for active individuals or those in humid climates. Desiccant jar systems contain silica crystals or other moisture-absorbing materials and require no electricity. Hearing aids sit in the jar overnight, and the crystals gradually absorb moisture. Combination charger-dehumidifiers for rechargeable hearing aids perform both functions simultaneously, offering convenience for modern devices.
At a minimum, use a dehumidifier 3 times per week if you live in a moderate climate and have normal activity levels. Increase nightly use if you exercise regularly, live in a humid or coastal area, or notice moisture-related issues, such as intermittent sound cutting out.
Remember that dehumidifiers have maintenance requirements too. Replace desiccant crystals when the colour-change indicator shows saturation. Clean electronic dehumidifier compartments monthly to prevent dust buildup. Never place wet hearing aids directly into charging cases, as this can damage both the devices and the charger.
Common Faults and Quick Troubleshooting
Even with excellent maintenance, you’ll occasionally encounter issues. Here are the most common faults and their typical solutions:
No sound or very weak sound: First, change the wax guard—this resolves the issue in most cases. For battery-powered devices, replace the battery and ensure the positive (+) side faces the correct way. Check that the volume isn’t turned down and that any manual program switches are in the proper position. Verify that the battery door closes completely; some devices won’t function if it’s only partially open.
Intermittent or cutting-out sound: This almost always indicates moisture accumulation. Place hearing aids in a dehumidifier overnight. Inspect for visible moisture in the battery compartment or tubing. If the problem persists after thorough drying, professional service is needed.
Whistling or feedback: Ensure the hearing aid is inserted correctly in your ear. Check that domes or earmolds aren’t cracked or ill-fitting. Verify you haven’t experienced changes in your ear canal (such as wax buildup or weight loss, which can affect fit). Persistent feedback after checking these factors suggests your hearing aids may need reprogramming or that your hearing has changed, requiring verification testing.
Physical damage: Cracks in the casing, broken battery doors, or detached receivers require professional repair. Don’t attempt to glue or tape hearing aids, as this can cause additional damage and void warranties.
When to contact your audiologist: You’ve tried basic troubleshooting without success, if sound quality has gradually declined over weeks, if you notice physical damage, if your ears have changed (more wax production, discomfort, or ear infections), or if you suspect your hearing itself has changed. Most clinics, including The Audiology Place, offer follow-up care appointments to address these concerns and can often resolve issues during a single visit.
Professional Maintenance and Follow-Up Care
Even the most diligent home care routine doesn’t replace professional servicing. Your audiologist has specialised tools and expertise that go beyond what you can accomplish at home. Schedule six-month check-up appointments as a standard practice, even if your hearing aids seem to be working perfectly.
During these appointments, your audiologist will perform deep cleaning of areas you cannot safely access at home, including internal components, using professional vacuum systems and tools. They’ll verify that your hearing aids are still programmed optimally for your hearing loss using Real Ear Measurement (REM), an evidence-based verification method that confirms amplification targets are met. The audiologist will check that all software is up to date, as manufacturers regularly release updates that can improve performance, battery life, or connectivity. They’ll also assess whether your domes, wax guards, or other consumables need adjusting and ensure your hearing hasn’t changed since your last full assessment.
This professional partnership is essential for long-term success with hearing aids. Research consistently shows that patients who maintain regular follow-up care report higher satisfaction, wear their devices more consistently, and achieve better hearing outcomes than those who seek help only when problems arise.
Your Downloadable Maintenance Checklist
To help you establish these healthy habits, we’ve created a simple checklist you can follow:
Daily Tasks (2-3 minutes each evening):
- Visually inspect both hearing aids.
- Wipe exterior with a soft, dry cloth.
- Brush the wax guard and sound port
- Clean the microphone openings gently
- Open the battery door or place it in the charger
Weekly Tasks (5 minutes):
- Wipe or replace domes.
- Use a dehumidifier (or increase to nightly if needed)
- Inspect tubing for moisture or damage.
- Clean storage case
Monthly Tasks:
- Replace wax guards
- Replace domes
- Replace batteries in storage (if kept as backup)
- Assess whether a professional appointment is needed.
Six-Month Tasks:
- Schedule a professional cleaning and check-up.
- Discuss any concerns with your audiologist.
- Update hearing aid software if available.
- Verify hearing levels and programming with REM.
Building Sustainable Maintenance Habits
Knowing what to do is one thing; consistently doing it is another. The key to successful hearing aid maintenance isn’t perfection—it’s developing a routine that becomes automatic. Consider integrating hearing aid care into an existing daily habit, such as brushing your teeth or your evening skincare routine.
Many patients find success by creating a dedicated “hearing aid station” on their nightstand or bathroom counter, equipped with all necessary tools: a cleaning cloth, a brush, wax guards, spare domes, a dehumidifier, and this checklist. When everything is in one place, the routine requires less mental energy and becomes second nature.
Remember that you’re not alone in this process. Your audiology team is your partner in hearing health, available to answer questions, provide refresher training on maintenance techniques, or troubleshoot when issues arise. At The Audiology Place, we maintain an independent, brand-agnostic approach, meaning our recommendations are based on your individual needs rather than on commercial relationships with manufacturers. This transparency extends to our maintenance guidance—we’ll always recommend the most effective solution for your situation, whether that’s a simple cleaning technique or a referral for more specialised care.
Hearing aids represent a significant investment in your quality of life, communication ability, and cognitive health. The few minutes you dedicate to daily and weekly maintenance protect that investment and ensure you receive the full benefit of better hearing. With consistent care, your devices will serve you reliably for years, allowing you to focus on what truly matters—connecting with loved ones, engaging with your environment, and living life to its fullest.


